Sorting Bulleted Lists in InDesign

September 13th, 2012

Recently while teaching an InDesign class to a group of students, I was showing off a great new feature that was added to InDesign in CS5 which is the span/split columns feature. This feature allows InDesign users to span a multi-column text frame or split a single-column text frame into multiple columns. After showing off this feature, one of the students asked if there was a way to sort the bulleted items alphabetically after entering them or after inserting new items. My initial reaction was no. But then I remembered a somewhat hidden feature that has been InDesign for many versions now that could accomplish this task.

I started with a text frame with some bulleted items within the text.

A typical InDesign bulleted list

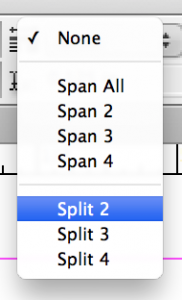
I then applied the split column feature to split this bulleted list into two columns.

Applying the Split Columns command

The bulleted list after splitting the columns.

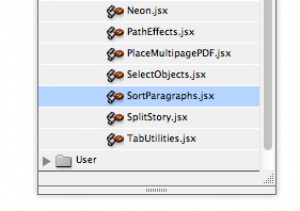
Now for the fun part. Go to Window > Utilities > Scripts to display the Scripts panel. Open the disclosure triangle next to JavaScript to open that category. Next, highlight the bulleted items (tip: don’t highlight the return character after the last bulleted item), then double click on the SortParagraphs.jsx file in the Scripts panel.

Highlight the bulleted items.

Double-click on the SortParagraphs.jsx script

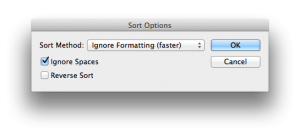
Specify sorting options

The Result

Admittedly the Sort Paragraphs script degrades as you have multi-word paragraphs to sort, but for most instances it does a fantastic job. I find sometimes that as new features get added to the Creative Suite Applications, we tend to forget about simple solutions that have been available to us for years. I hope you enjoy this post!

Multiple Artboards

January 11th, 2010

The Creative Suite 4 added a new feature to Illustrator that has been long awaited, Multiple Artboards. Multiple artboards allow you to easily experiment with your artwork. Creating multiple iterations of a logo can now be done on individual artboards which makes it easier to view and print independently of one another. I want to stress at this point that I do not in any way encourage people to create multiple page layouts in Illustrator. IMHO this is a job for InDesign, as it handles multi-page layouts much more elegantly than Illustrator. I am a proponent of using the right tool for the job when it comes to working with design applications and this is no exception. Let’s take a look at how artboards in Illustrator CS4 can streamline how you create artwork in Illustrator.

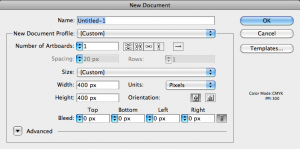
Let’s begin by launching Illustrator and choosing File > New to bring up the New Document dialog box.

New Document Dialog box

Note that among the new features in this dialog box are the ability to specify the number of artboards in your document as well as the amount of bleed for the artboard. This is a long requested feature!

In this example, I’ve set the width and height of the document to 400 px but you can set the size to your desired amount. Click OK and a new document is created.

I’ve added some basic artwork to the artboard to use for this exercise, add the artwork of your choice to follow along. Arboards can be easily adjusted using the new Artboard tool Artboard Tool. Select the Artboard tool and a bounding box appears around your Artboard with resizing handles. Drag them to readjust the size of your Artboard. When you’re happy with the new Artboard dimensions, simply click another tool to exit the Artboard editing mode. To add an Artboard, simply select the Artboard tool and drag with your mouse to create a new artboard next to the existing one. Click in the middle of the selected Artboard to move the location of the Arboard. When moving an Artboard within your document, note that there is a button at the top of your screen in the Control bar Move artwork with Artboard buttonthat determines whether your artwork moves with the Artboard or not.

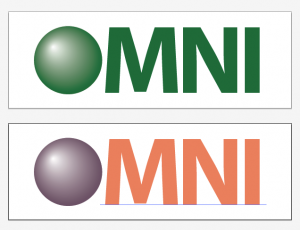
With the Artboard tool selected, click on your Artboard and then hold down the Option (Mac) or Alt (Win) key and drag the Artboard to make a copy of it. Now make a change to the artwork on the second Artboard to easily create a new version of your logo.

Image of Multiple=

Once you start utilizing the multiple Artboard feature in Illustrator CS4 you’ll find that it really allows you to work efficiently and more creatively within Illustrator.

Check back next week to see how multiple Artboards can help make your life easier when working in Adobe InDesign. See you next post!

Thumbnail Place in InDesign

January 5th, 2010

InDesign CS4 had added a number of new features that I’ve grown accustomed to using each and every day. One of those features is the Thumbnail Place feature. The ability select multiple graphics after choosing File > Place is a great new feature in and of itself, however often I find that all I want to do is see all of the images in InDesign so I can analyze them or begin placing them and sizing them in my document. Let’s take a look at how the Thumbnail Place works in InDesign CS4.

  1. Choose File > Place and select several images in the place dialog, then click the open button. The place gun appears with the number of selected photos in parentheses.
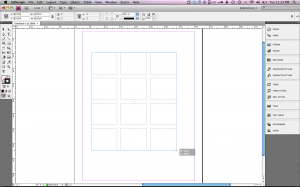
  2. Hold down Shift + Command (Mac) or Shift + Control (Windows) to get the Grid Place icon and click and drag with your mouse to draw a grid using your placed images. Don’t let go of that mouse yet!
  3. As your dragging with your mouse, you can release the modifier keys but continue to drag to establish the size of the images in the grid. While dragging, press the right or left arrow keys on your keyboard to add or remove columns from the grid or press the up and down arrow keys to add or remove rows from the grid.
  4. InDesign Grid Place

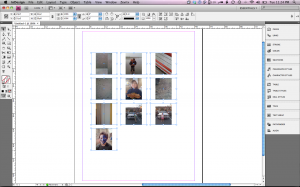
  5. Once you’re satisfied with the number of thumbnails, release the mouse button and voila! Instant thumbnail placement.

Images placed in thumbnail orientation

Once you know this trick, you’ll be surprised at how often you’ll use it and wonder how you lived without it.